
Around 2006-07 while working in Asia, I purchased 25 acres on the side of Cardigan Mountain in New Hampshire unseen. The land is on an old logging road, about 3/4 mile from a town maintained road. This means that the logging road will not always be accessible to vehicles, as it does get washed out on occasion, and would only be repaired if there is logging up the valley. I did have my brother walk it with the realtor, and had an idea what it was like, as I have hiked and skied this mountain many times . Not sure exactly why I was driven to do this, other than my second marriage was coming to an end, felt adrift in Asia? seemed like a dream cures all.
I had always felt that a Yurt would be appropriate, as they offer great shelter , are reasonably priced, and because of how they are assembled, can be set up far enough from a road that there is the feeling of being in a wilderness setting. Also because of the location or accessibility to Mt Cardigan State Park, i though that I might be able to rent to families as well as back country skiers . Yurts have an appeal !
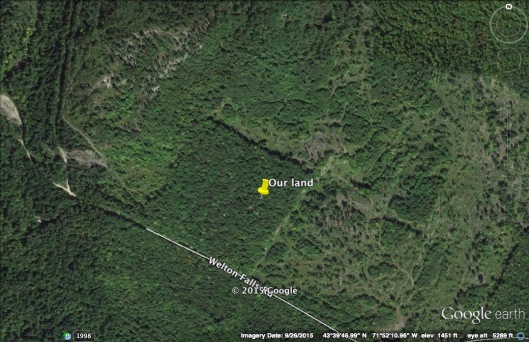
As you can see the 25 acres above looks like postage stamp, as the land on 3 sides have been clear cut. Actually from the top of Mt Cardigan that is how you can locate this plot.. The push pin is roughly where the Yurt will be ( as of this writing) The logging road is called “Old Dicey Mill Road “, but on Google Map it is call “Welton Falls Road”?
First things first, so time to start clearing an area, big enough for the yurt, as well as random trees that look like their fall trajectory may impact the yurt :-). This is a great way to start stockpiling firewood and get a little exercise. Notice the Safety apparel. We also were going to
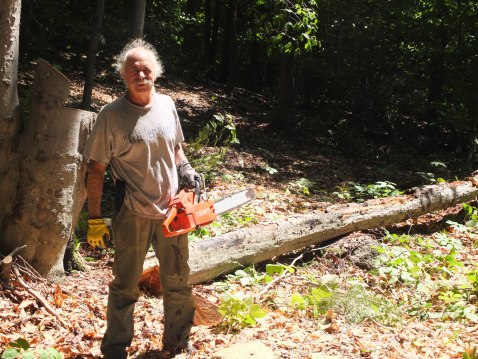
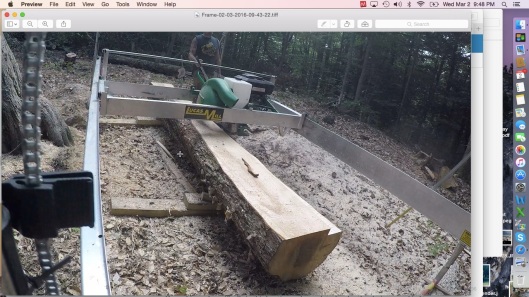
mill some lumber for future projects. We had decided that we did need a small portable wood mill, as some times we need to cut down a tree, that is so nice it is a waste to use it for firewood, so another toy for an old guy. The is a Lucas Swing blade built in Australia. the reason that I picked this saw mill, is that it can be moved on top the tree, as opposed to bringing the tree to the mill… Most mills are band saw mills,they are portable, but you still need to drag the logs to the mill, and then turn them over until you have a square timber, at that point you can start cutting boars, or just as a beam. And would definitely need a tractor, which I was not ready for at this time.
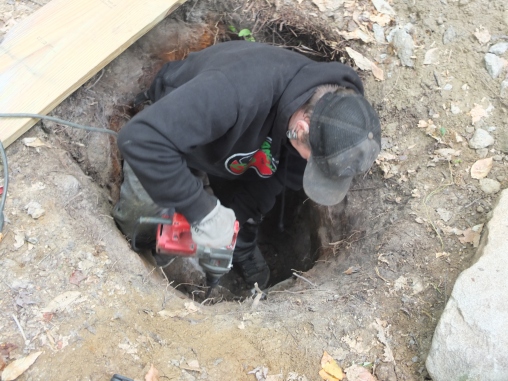
One of the second activities from my perspective , is to build a toilet or Outhouse first. In New Hampshire and specifically in this location we have a lot of rocks, the glaciers were kind to us. Because we were so lucky we located our hole for the outhouse about 2′ above a bodacious rock, that pretty much completely filled the hole
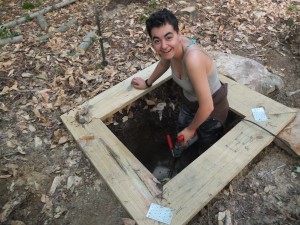
This is a photo of Max, jack hammering New Hampshire rock, little bit by little bit. I think at this point we were maybe 2′ deep.. so, that is what we did, little by little. If not me, then Arissara, Nate , Max , or Josh. Josh had a talent for this type of work. 😉
At some point i returned a borrowed rotary hammer, and bought a larger robust Milwaukee off of Craig List ( I love CraigsList) I buy almost everything from them . We would either drill a series of holes not to far from the edge, then try to chisel between the holes. The rock was relatively soft so small section would fracture, then we would work our way down.
When digging the holes for the 4×4 or 4×6 post that support the platform we went through the same exercise. The gold standard up here is 4′ deep. Unfortunately in most situations we were only able to get down to 2′, but most were down to 3′. Because these were relatively small Dia holes 12″ , it was impossible to get the rotary hammer much deeper. At the bottom of these holes, when we hit substantial rocks we layered the bottom with crushed gravel, which was a great way to adjust the height. Sometimes we even moved the holes, as long as it was along the same line, but not to far from target it would be okay.
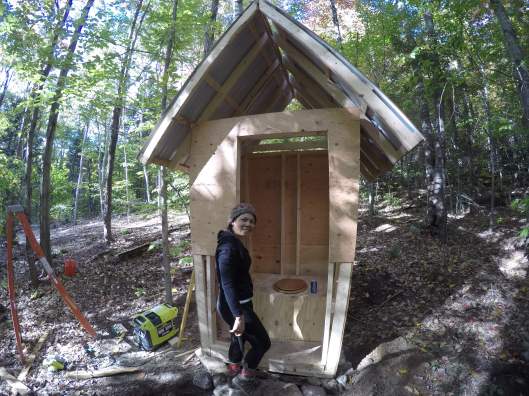
Back to the outhouse ! after we got down to 4′ and yet hit another rock, we stopped. I had an Outhouse idea , essentially to have the side walls pitched out and a pretty steep roof. Reasoning was to keep the rain from splashing on to side wall, and to shed the snow. We also have to be able to move it, onto another hole for obvious reasons. I prefabbed both side walls and roof half’s. Usually when I do something like this, I will screw something up? but this seemed to go together with a little elbow grease and a lot of help from Arissara. Probably should have set the toilet seat back another 6″ back from the door
DCIM100GOPROG0200375.
as I need to open the door? well not really, just makes it more comfortable as my knees hit the door. I ended up framing the door out with 2″ maple stock, but still not really enough. You can see the little generator we purchased for the project. We will paint the outhouse , to look like a birch forest. Not sure what to do with the gabble open end? maybe wattles.
The plan was to focus on the outhouse, and once finished we moved to the 21 holes for the Yurt platform. When I first spoke to White “Mountain Yurt” (Paul) , I visited a newly erected 24′ Yurt , the first thing i noticed was that there were no footings, all of the post were set a little bit below grade on 10″x10″ concrete pedestals, the 4×4 fit into the top of them. It was like the Yurt and platform were floating? However when I downloaded the platform design, it included posts below frost line? Seemed like a floating deck would be affected by frost heaves?? Plus would be susceptible to big wind. Normally I would dig a 4 ‘ deep hole, set a sona tube to the bottom, pour concrete, and set a PT 4×4 into it. Of course, with no water for concrete, and with rock bolder’s randomly broadcast through out the sub-terrain, at random depths, we ended up just going as deep as we could , mostly at 3’ with a few inches of gravel on the bottom . with a 4×4 or 4×6 in the center beam ?? Not sure why i did that? The gravel made it easier to set elevations, just twist the 4×4 and they would settle down to what was needed. A lot of opinions on the longevity of 4×4 in these conditions ? My friend Al has built many raised cabins, that are over 30 years old, and still supported by 4×4 direct bury?No issues.. So whose to know ? I will get back to you on that.

Arissara and Danielle at it, digging those holes!
Because of the boulder situation we did move holes, but only along the beams, not more then 6-8″ though. The best way to dig, is with a digging bar, which we had a few of. Just keep pounding away till we hit a rock, and sometime we could pry it out, if not we used the rotary hammer. Drill a series of holes then change to a splitting bit. I think at some point we needed to see progress, so started putting the posts and beams into place.
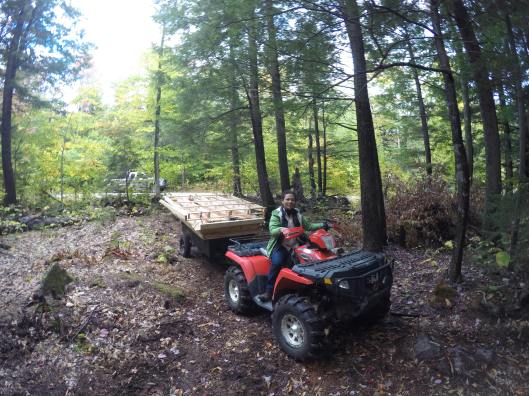
This how we moved most of the lumber up through the woods. You can see the truck in the background . When we bought the ATV, Arissara talked the seller into throwing in and old trailer. After a lot of thought, I decided to cut 12″ out of the middle, as it was to wide to pull through the woods, I also cut a foot off of the end. At some point I am going to weld the rear frame, as it is pretty wobbly , when you load fifteen 12′ 2″x8″ on it

Here we are installing the insulation panels between the beams, as the beams are in place. You can also see the 2″x6″ TG boards on top, as we are starting to install these as well. The decking was built with TG decking as they are 2″ thick or really 1″-1/2 thick so combined with how the fit together they can span 4′, as opposed to plywood or 1″ boards that can only span 16″, which would mean more lumber and probably more digging.

Well here is Ma and Pa kettle, having just cut the 24′ circumference . We used a 13′ 1×1 with a nail set in and through, at the 12′ point. Just set the nail in the center and a pencil at the other end and voila a pretty perfect circle.. I thought I was going to need to buy another tool for cutting this radius, but ended up trying my 7″ circular saw , which did a great job. After this we screwed on the bender board around the circumference, which is a 3/8 PT plywood , cut into 12 ” strips.. The bender board is what the child gate walls set against.

But, before all of that, we needed to buy a wood stove,, A big wood stove ! so back to Craigs list, where we found a Dutch West stove including double insulated stove pipe, including Tee’s, elbow’s , brackets, for $500.. I am still amazed about this find.. Now we had to find away to get it off of the truck onto the trailer, up to the yurt and onto the deck.. The stove weighed in around 500 lbs.. All I can say is that my Wife is amazing , as she is always ready to tackle any project
Moving the stove from one truck to other was easy enough, as we just backed the trucks together and slid the stove over, lucky the legs had been removed. Once we arrived at the land we backed up the ATV trailer, and set the ramp from truck bed to ATV trailer..

DCIM100GOPROG0340405.
We tied the stove to a 2wheeler and tied a rope to it that was also attached to a point in the front of the bed.. The thinking was once it got on incline , it would take off, so I needed some way of controlling the descent.The next problem was toit enough so it would not shift. Many of the loads were heavy enough that because of the speed and uneven trail, things would shift. I was worried that it would flip the trailer over, so we tied a few extra straps secure

Here is the whole Yurt in the back of our pickup ? kind of amazing.. although maybe Nat had a couple of buddies. It was lucky we had him with his car.

This is the morning that we started.. you can see we have already brought everything up from the road . Now just to start.
This obviously is the Dome. Nate and Arissara will bring up the frame .

Some items like the dome and frame as well as many other items , were easier brought up by hand

we strapped a long 4×4 to the top of the wood stove and were able to lift it onto the deck.. Figured this was the time to get it up there.
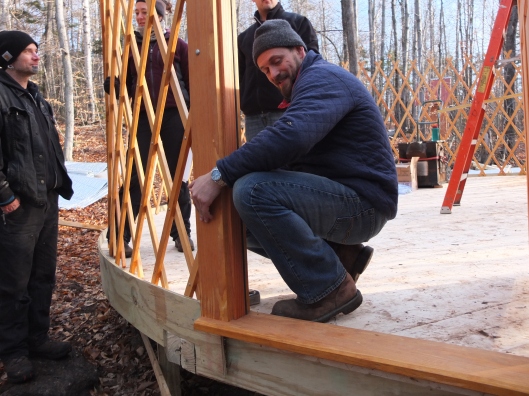
this is the door which goes in before the wall. You can see where we left an opening in the bender board. their is actually a facia board on the frame of the door with a couple of wing nuts. The end of the wall fits between the boards, and you just tighten the nuts , which captures the walls.
so this is the wall? I know it does not look like a wall, but it is the structure that supports the roof and the siding.. Important to spread it around and against the bender board, and make sure the height of the top is constant around the circumference

After adjusting the height of the the wall, next step is to interwind the steel cable through the top of the wall. The cable is precut with hardware mounted on both ends, so pretty easy.
The dome frame is suppose to be erected from staging? it seemed easier to just mount it temporarily with three 2×4, and work off of the ladders (12 footers)

so this is where I fucked up.. the end of the 2×6 rafters are pre-cut angled and pre-drilled. So it seemed that that is how they should be mounted,, Wrong>> ,. so we mounted a bunch that were upside down.. If you look at the end of the rafter below they should really be flush with the wall, not angled out? Lucky we had some clear thinking folks to help see through this. Thanks to Mike P.

The other issue is how to determine that the center frame brackets are in line with open spaces on the walls , where the rafters are to be connected ? The directions were useless, I had asked for the directions a couple of weeks early, but was told that they would come with the Yurt? ( we live in the electronic age right?) I did find the directions later , after the assembly was completed, on line, as they seem to be standard bad directions that many Yurt companies use. At any rate, part of the problem is that the wall has a few more spaces for rafters then there are on the center bracket ( 24′ dia yurt only).. so we needed to skip 3 spaces? So in the end Mike P suggested that we number all of the brackets on the center ring and number all of the spaces on the wall( careful to skip 3 spaces, as long as they were opposite each other . Then we just connected rafter to same number on ring and to the wall. It is good to install opposing rafters first, then fill in the remainder.

DCIM100GOPROG0470493.
After all of the rafters are in, you will need to shift the center ring around until it is level, When it is level then tighten all of the bracket bolts that the rafters are in , on the center ring. After that we slid the liner on top of the rafters and also placed the insulation on top of that.. The liner is really to just find the shiny insulation.

Now we have arrived to the hard part,, The roof! Not sure what this weighed , but maybe 150b’s.. so 2 people need to carry it up the ladder, set it on the center ring and unfold it to one side then the other. it does matter how you open it, as there is a valence over the door.. Suppose to be a mark indicating where this is, obviously we never saw it, even though we looked for it. Yes we did open it 180 degrees wrong.It turned out to be not a problem as the roof was setting on insulation that was sitting on a liner so we were able to rotate it around to it proper position . It was a little chilly , and we did set it in the truck with the heater on, probably should have left it in the truck for a lot longer, as the plastic as it is hard to work with when it is chilled.
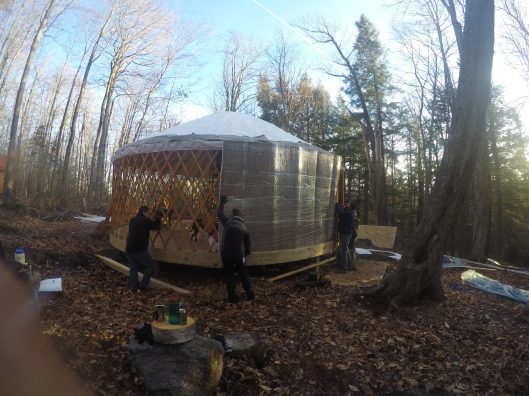 In this photo you can see the roof is on but the roof flap is peeled back to accommodate the wall panel/insulation which is a white vinal interior and aluminum insulation on the out side. Generally start on the left sie of the door or 1;pm if the door is at 12, and work yourself around.. this is important as the windows are placed based on a clock systems, which will have to match with the exterior cladding.

DCIM100GOPROG0630527.
The outside wall has rope loops sewn in the top, so to attach we needed to daisy chained the rope loops through through grommets mounted to the edge of the roof. The problem we had was with the height of the wall? It turns out you can and should adjust the height of the wall with these rope loops? never knew that based on the instructions. We were suppose to do this? but if the wall is to high then the roof is going to hang over the window cover roll up? We have not corrected this yet, but now I assume that you set the top of the wall based on the top of the door. The edge of the wall is captured by an aluminum plate that is bolted to the door frame..
 So here we are all finished? as far as as we could go.. I cannot describe how much fun, and more importantly how mush everyone helped to make this happen. I never knew who exactly was going to show up, but friends did! and they showed up at different times and contributed when the time was right for them.. This is why I love construction! because this is what happens. 😉

DCIM100GOPROG0710535.
Now the Yurt is up, and it looks so small? But we still have more to do? get the wood stove installed, snow load 2×4 installed, sand the floors and stain.
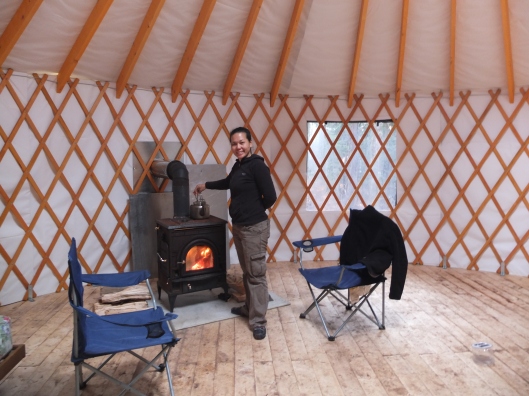 We did get the Stove installed. When you buy the kit they offer another add on, which is essentially 2 aluminum plate 18×18″ or 24″x24″.? Seems like you can get this on your own? any rate, set the stove and pipe will through the wall frame, mark the wall and the plate and cut.. drill 3 holes on each side and bolt wing nuts through the plate.. Based on the square footage, one would assume that you would need a small stove? But because of the wall thickness ( lack of), and the cold. i suggest in the strongest terms to get a large stove, possibly twice the size based on square footings. The other issue is the floor, which should be insulated but still will be cold. Regarding the floor, my only suggestion is to wear slippers. 🙂 A radiant floor heating system would be worthwhile, just not sure how to accomplish that goal, as if you install a water heater in wood stove or wrap stove pipe with tubing, what happens is that you cool the stove which creates another problem .. So we are still investigating options.
 Here you can see the wall supports have been installed, and we have 1 futon .. The option for the wall sports was $500. this included all of the 2×4 with brackets on both sides of rafter to studs and studs to floor. Good to install brackets on both sides . I think we spent $200. so saved a few bucks but it was a lot of work. Just after this photo we started sanding the floors by section and staining/ urethaning. Always better to finish the floor first but some times timing does not allow this.. I used an orbital sander, maybe a belt sander would have been better.?
 Now things are starting to look good, the floors are finished. we have 2 futons with cool covers.
For the past month , well starting in Jan. we posted an Ad in Air BnB figured we could rent the Yurt on weekends. My worry going into this, was that some folks are going to rent it with expectations that there would be heated towels, clean sheets, etc, etc.. You know what I am talking about. So when ever I was contacted from perspective customers, I would list all of the “don’t have” items. No water, lights, electric,cable, cell, heat but with a wood stove that will need to be tended around 2 am. Also facilities is an out house, and the potential show stopper, was the real potential of having to walk in a mile. Well, surprising to me after my full disclosure speech , was that every one said that that is exactly what they wanted! We did have couple rent it, one weekend when it was -20 f , they were cold, but managed it.
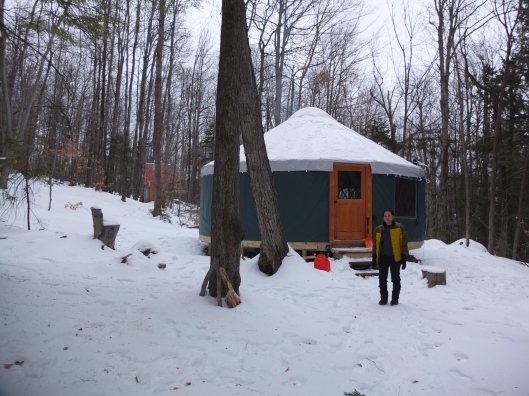
Going forward , we are going to build a deck, and get a couple of solar panels , so we can have light . This was a problem in the winter, when the sun goes down at 3:30.
So, the long term projects will be to build a 12’x 24′ cabin on another corner of the lot, and possibly build a 2nd yurt. As the retirement yurt business may be a viable option.

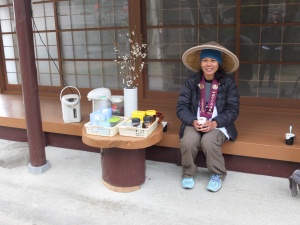


 , “Child of the Sea” The mountains surrounding the lake are actually the edge of the crater? I think this blew around the 1300? but it has been a long time.


